You roll your upper back for a few minutes, stand up, and feel a little taller and looser. Twenty minutes later you're hunched over the keyboard again, head creeping forward, shoulders rounding in. If that's the loop you're stuck in, the foam roller isn't the problem. It's how you're using it. Foam roller posture exercises can do real work — but only the right ones, in the right order, paired with something that makes the change stick.
A foam roller is good at one thing: easing tight, overworked tissue so you can move into a better position. What it can't do on its own is hold you there. So rolling is step one, not the whole plan. Used that way, it earns its place.
What the roller actually changes
When you sit hunched for hours, the front of your body shortens — chest, the muscles between your ribs, the front of your hips. The back of your body stretches long and overworks to fight the slump. A foam roller helps you reverse the short, stiff side so your spine has room to move back toward neutral. It's mobility, not magic.
This matters because most posture problems aren't a single tight muscle. They're a pattern: something pulling you forward, something gone quiet behind. Rolling the tight side opens the door. What walks through it is up to the strengthening you do next. The slumped-shoulder version of this pattern is laid out in rounded shoulders, and the head-forward version in forward head posture.
The roller buys you room. What you do in the next ten minutes decides whether you keep it.
The routine
Roll slowly. You're looking for tight, tender spots — pause and breathe on them for 20 to 30 seconds rather than racing back and forth. Five to ten minutes total is plenty.
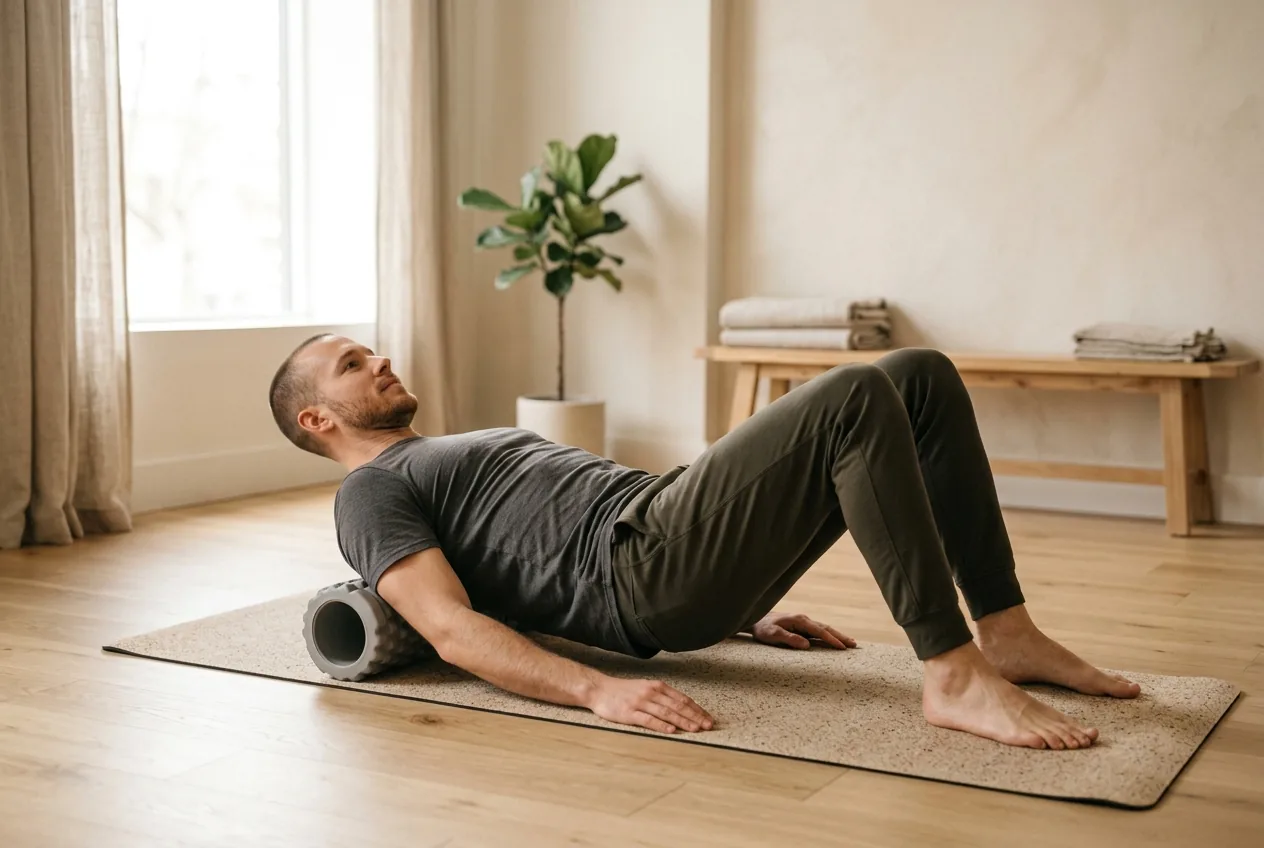
1. Thoracic extension over the roller
This is the most useful one for posture. It mobilizes the stiff mid-back that locks you into a slump.
- Lie back with the roller across your upper back, under the shoulder blades, knees bent, feet flat.
- Support your head with your hands, elbows pointing up.
- Gently arch back over the roller, let your upper back extend, breathe out.
- Inch the roller down a little and repeat, covering the mid-back. Stay above the lower back — don't roll the lumbar spine.
Do three or four passes. Keep your ribs from flaring by bracing your stomach lightly.
2. Chest and front-of-shoulder release
Tight chest muscles round the shoulders forward. Place the roller vertically along your spine (head to tailbone), lie on it, and let your arms fall open to the sides in a T or goalpost shape. Gravity opens the chest. Rest there two minutes, breathing slowly. Simple, and it counters hours of reaching forward.
3. Lats and side of the back
The lats run from your arm down the side of your back and pull the shoulder down and in when tight. Lie on your side, roller under your armpit, arm overhead, and roll slowly along the side of your ribcage. Pause on the sore spots. 30 seconds each side.
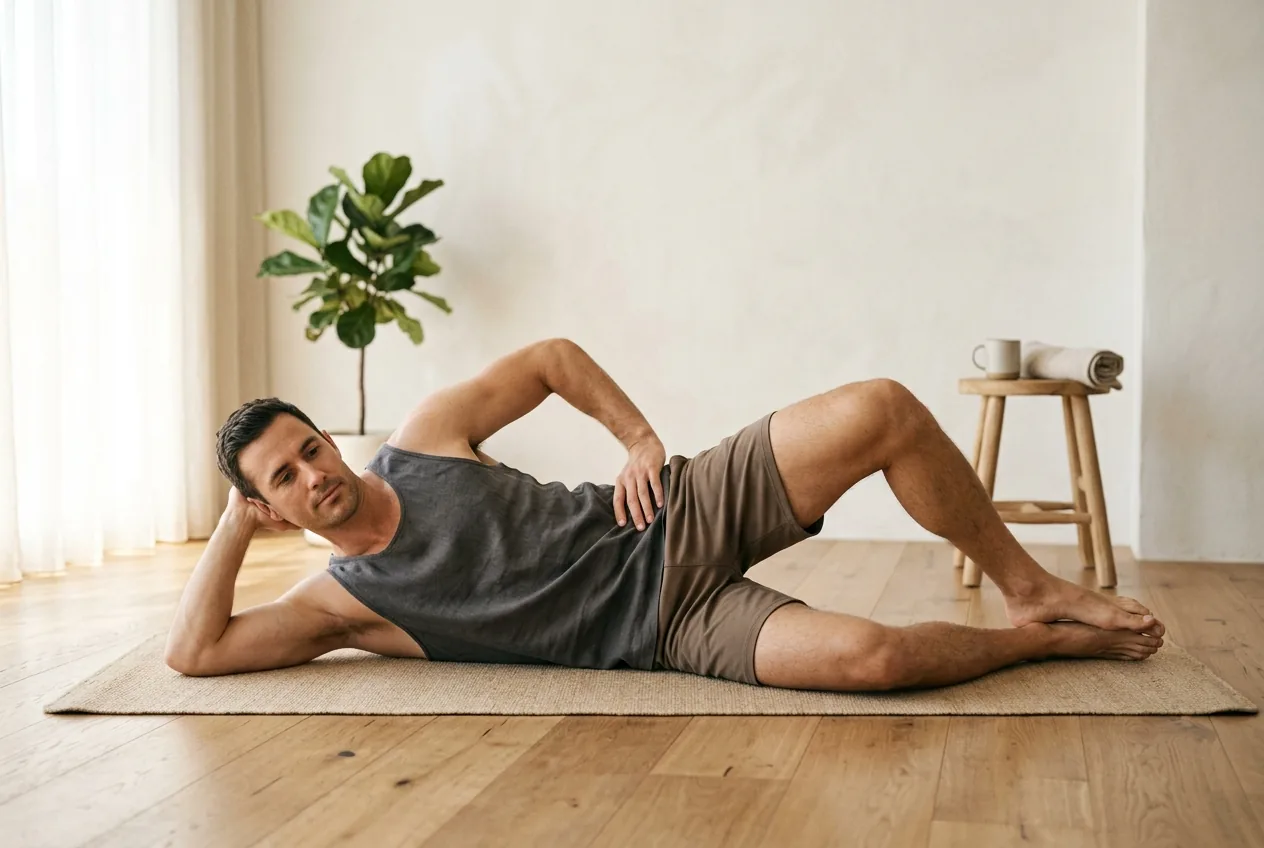
4. Glutes and the front of the hips
Posture isn't only the upper body. Tight hips tilt the pelvis and pull the lower back into an arch. Sit on the roller and cross one ankle over the opposite knee to find the glute, rolling slowly. For the front of the hip, the roller is awkward — a proper hip flexor stretch does that job better, so pair the two.
The part people skip
Here's where rolling alone falls short. You've spent ten minutes opening the tight, short side. Your shoulders sit back, your mid-back moves freely. Then you sit down and the muscles that are supposed to hold the new position — the ones across your mid-back and the deep neck muscles — are still asleep. So within the hour you've collapsed forward again.
Rolling without strengthening is a loan you keep repaying. To make the change hold, follow every rolling session with a few activation moves:
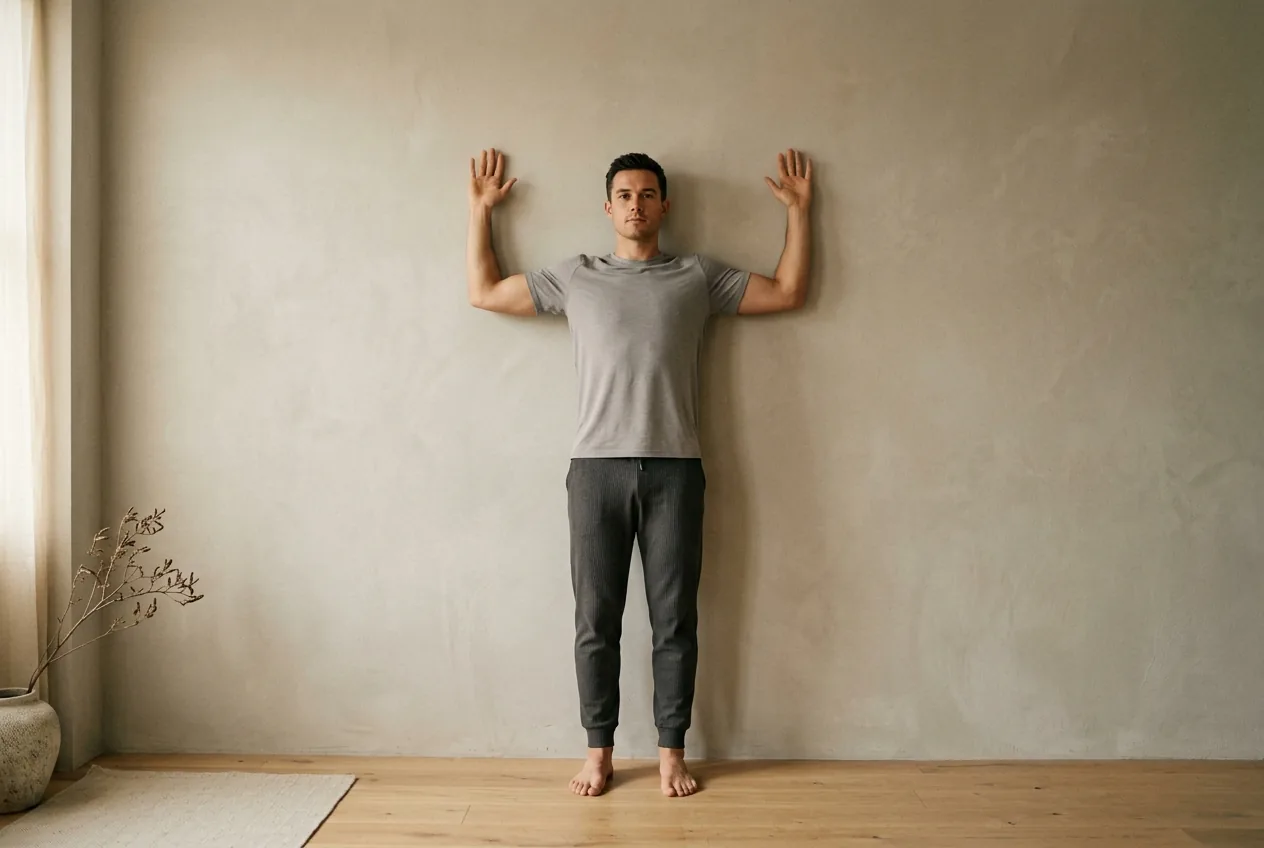
- Wall angels to wake the muscles that pull the shoulders back. The full how-to is in wall angels.
- Chin tucks to switch the deep neck muscles back on so your head stops drifting forward.
- Glute bridges to fire the muscles that keep your pelvis level. See the glute bridge for back pain.
Roll to open, then strengthen to hold. That order is the whole point.
What to stop doing
- Stop rolling your lower back directly. The lumbar spine isn't built to be pressed over a hard cylinder, and it can make a cranky back crankier. Roll the mid-back, glutes, and hips instead.
- Stop grinding on a painful spot for minutes hoping it'll "release." Brief, slow pressure does the job; aggressive rolling just bruises tissue.
- Stop treating the roller as the finish line. If you only ever roll, you're managing symptoms, not changing posture.
- Stop rolling right onto bone or a joint. Stay on muscle.
When to see a doctor
Foam rolling suits ordinary muscular tightness. Skip it and see a clinician promptly if you have numbness, tingling, or weakness running into an arm or leg, any loss of bladder or bowel control, back pain that followed a fall or accident, fever with back pain, unexplained weight loss, or pain that's severe or steadily worsening. Sharp or shooting pain while rolling means stop — that's not the muscle release you're after.
Why a generic routine only goes so far
The moves above help most people, because the slumped, head-forward pattern is so common. But how stiff your mid-back is, how tight your chest sits, whether your pelvis tips forward or tucks under — that varies from body to body. Roll and strengthen the wrong areas for your pattern and you'll work hard for little.
Lasting relief comes from knowing your own setup: which muscles switched off, which are overworking, where the roller will actually help you. A posture-based approach measures your real deviations first, then matches the mobility and strengthening to your body instead of hoping a popular routine happens to fit. Use the roller to open the door — then walk through it with the work that holds the new position in place.
Common questions
Can a foam roller fix bad posture?
On its own, not really. A foam roller eases the tight, short muscles pulling you forward, which gives your spine room to sit straighter. But nothing holds that new position unless you also strengthen the muscles meant to support it, so rolling works best paired with activation moves like wall angels and chin tucks.
Should you foam roll your lower back?
It's better to avoid rolling directly on the lower back. The lumbar spine isn't built to be pressed over a hard cylinder and it can aggravate a sensitive back. Roll your mid-back, glutes, and hips instead, and use stretches for the front of the hips.
How often should I foam roll for posture?
Short, regular sessions work better than long, occasional ones. Five to ten minutes most days, ideally before your strengthening moves, is enough. Frequency matters more than duration when you're competing with hours of sitting.
Does foam rolling hurt, and is that normal?
Mild tenderness on a tight spot is normal and should ease as you breathe and hold. Sharp, shooting, or bone-on-roller pain is not — stop if you feel that. Slow, moderate pressure does the job; grinding hard on a sore area just bruises tissue.